Pages

Saturday, December 31, 2011

Looking back 2011


Every year has it is own story to tell. 2011 had it is own story. We experienced it ALL globally, continentally, stately, locally, communally, as a family, and individually.  
2012 will bring in its strengths and weakness. It is how WE accept 2012 to bring the BEST out of it, or LIVE up to the GOALS we set on the dawn of the New Year...
It has been great to know many of you through blogging including friends, and family. I wish you all a very Happy New Year...
Enjoy!

Friday, December 30, 2011

Winter Break...


Nicolette turned 3 today... We celebrated her B’day. I did made this wonderful B’day cake just for us it was way too much cake for family of four. We will share with many as we can. I do not want it to sit for a longtime in our house. 
Nicolette went through all the roses. I was afraid given the time we cut the cake how she is going to sleep. She enjoyed every bit of it.  
Her big brother was a great help and enjoyed every bit of it. My friend wants me to make a wedding cake for her. I guess I did a great job. I did baked her 3rd B’day cake and it was fun. We will be celebrating her B’day party soon...
Here comes cake...
Quote of the day "share / give / receive"
Enjoy!


Thursday, December 29, 2011

Winter Break...


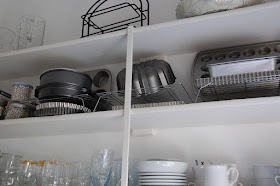
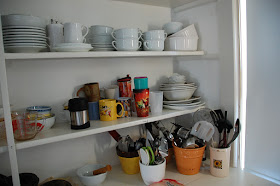
This winter break I have planned out few projects to do... I am happy with my grades but planning to do better coming spring. Getting back to the subject one of my project was cleaning out the pantry and organizing. Well my pantry is not the traditional pantry since I have itty bitty kitchen. I was determined to utilize every inch  I have. I still cannot bring in all my dishes that I have accumulated over the years but got what I needed in other words the basics. 
Well, I am not complaining I choose this simple life because the priority is to finish my school. I am working hard towards this goal. Sometimes I do need a kitchen with all the gadgets. I need to wait on that  for a while. 
So I did the best I can to make room and organize the pantry. The best thing was I acquired a kitchen cabinet absolutely free from my neighbor. She was kind enough to offer it to me I did not think twice, quickly hauled it inside with my sons help. This happened at the beginning of fall and now we are way into winter I decided to clean, wash and re paint the outside to match the pantry and was able to house all my spices from SRI LANKAN COOKING and CHINESE COOKING. 
Now that my shelves are free I was able to organize the pots, pans, glassware, and all the knick knacks. 
I am not trying to get any of you into spring cleaning. I acted way early because I wanted to organize the pantry for the longest time since we had moved in. I usually go to kitchen, make something and get out of the kitchen. I had this ideas of creating places for some activities I often do in the kitchen. Like Breakfast items, Tea station, electric appliances, and baking.  I felt so chaotic when I stepped into my pantry before because it was a mess. Now I am happy to go in and see the neatness. I did not spend a dime to do it used what I had. Few more touches then I am done. 
I did work with my 13 year old to do this, we talked about the chores and the utensils we need.  How to house the items we use often. This was fun because I had no idea how to accomplish this.  I did listen to his ideas we worked together considering little Nicolette is getting independent making breakfast. However, both of us did great at the end cleaning and organizing. I hope he will carry this with him in his life as well.
I can happily check off one item from my to-do list. 
What are you up to lately are you cleaning, organizing, or in the process of making new year resolutions. 
Quote of the day “ brainstorm”
Enjoy!


Wednesday, December 28, 2011

Holiday Cookies - Cranberry Butter Cookies


We LOVE cranberries it supposed to be really goof for health in many ways but definitely not with butter. We wanted to incorporate this ingredient into cookies. I found this recipe from Martha Stewart’s christmas cookies. They are definitely define to devour. if you are in rush but do not have much time this is something easy to make and  really yummy.
I had so much fun making them. Since the cookie making is fairly new to me I have not yet mastered to make them into logs for easy cut outs. I am working on that task. 
What you need
1 cup (2 sticks) unsalted butter, room temperature
3/4 cup sugar
2 tablespoons milk
1 teaspoon pure vanilla extract
2 1/2 cups all-purpose flour
1/2 teaspoon salt
3/4 cup dried cranberries
1/2 cup chopped pecans
How it is done...
In the bowl of an electric mixer fitted with the paddle attachment, cream the butter and sugar on medium speed until light and fluffy, about 2 minutes. Add milk and vanilla. Beat until just combined. With mixer on low, gradually add flour, salt, cranberries, and pecans; continue beating until fully combined.
Turn dough out onto a clean work surface, and divide into 2 equal pieces. Shape each piece into an 8-inch log, about 2 inches in diameter. Wrap logs in plastic wrap, and refrigerate until firm, about 2 hours.
Preheat oven to 375 degrees. Using a sharp knife, cut logs into 1/4-inch-thick slices. Transfer to parchment-lined baking sheets, about 1 1/2 inches apart. Bake until edges are golden, 14 to 16 minutes, rotating baking sheets halfway through. Remove from oven, and transfer cookies to a wire rack to cool completely.
Cook's Note
Once formed into logs and wrapped well in plastic, the dough can be stored in the freezer for up to a month. Before slicing, leave the dough at room temperature until it just begins to soften. For a festive variation, roll the edges in colored sanding sugar before baking.
Quote of the day"eat a big salad before you go to a restaurant” 
Enjoy!

Monday, December 26, 2011

Tropical Rum Balls for Tropical Holiday Weather


This year the weather has been real crazy. It has been warm here in MA. I am not complaining a bit. I enjoy the extended FALL this year. This year the weather has definitely taken a spin. I sometimes wear short sleeves inside the house. Little Nicolette does not want to be under the cover and she keeps taking the blanket off from her when tucked in the night. Big brother refuses to take the down blanket out of the storage bag. 
Well I wanted to celebrate the extended weather with traditional rum ball instead of dark rum I substituted it with coconut rum. Many adults liked and appreciated it very much. 
You need:
Vegetable oil, cooking spray
3/4 cup (1 1/2 sticks) unsalted butter, cut into pieces
6 ounces semisweet chocolate, finely chopped
3 large eggs
1/2 cup packed light-brown sugar
1 teaspoon pure vanilla extract
1/2 teaspoon coarse salt
3/4 cup all-purpose flour
1/4 cup plus 2 tablespoons coconut flavored rum
Coarse sanding sugar, for rolling
How it is done...
Preheat oven to 350. Coat a 12-by-17-inch rimmed baking sheet with cooking spray; set aside. Melt butter and chocolate in a small heatproof bowl set over a pan of simmering water, stirring occasionally. Set aside.
Whisk together eggs, brown sugar, vanilla, and salt in a large bowl. Stir in chocolate mixture, then fold in flour. Pour batter into prepared baking sheet. Spread evenly with a rubber spatula. Bake until top is shiny and a cake tester inserted into center comes out with some crumbs attached, about 10 minutes. Let cool completely on a wire rack.
Break up brownie into small pieces; transfer to the bowl of an electric mixer fitted with the paddle attachment. With machine on low speed, pour in rum, and mix until crumbs start to come together to form a ball.
Shape into 1-inch balls, and roll in sanding sugar to coat. Transfer to a baking sheet; refrigerate, uncovered, until cold, about 2 hours. Serve chilled or at room temperature.
Quote of the day “have faith in your own ideas”
Enjoy!

Sunday, December 25, 2011

Nicolette received her first baby doll...


Yes, Nicolette received her very first baby doll. She was so happy to received it and had a ton of FUN. I took her to the toy store and it was a crazy place. I could not find a a decent toy.

I have noticed recently she has been putting her plush toy cat to sleep. This is indeed a wonderful experience for me. After raising Niegel with boy toys and to see this girly kind of play was interesting. I wonder what goes in her mind to cuddle the cat, wrapped, and even sometimes to offer a bottle.  Keep in mind the bottle she offers is no close to a  bottle it is a piece of puzzle or sometimes could be a toy car from her brothers toys.

I questioned myself a lot before buying her this baby doll. I realized it was the time to offer her the doll. Of course my son had no interest buying the doll because he does not like dolls at all in the house too bad now it is time to get use to it.

We were all happy that Nicolette was having a great time with he new presents.

Quote of the day “ cuddle your children”

Enjoy!

Peppermint Bark for Holidays...

Do you make peppermint bark. This is one of my favorite holiday treats I LOVE. I use to buy this when I was working. This is one of the easiest holiday treat you can make and in well advance. You can store it up to 2 - 3 weeks. If you are well disciplined. 
On the other hand if you are not a peppermint person you might not like this as well.
I would not substitute quality on ingredients on this recipe. I am sure you prefer quality over quantity. If you are not a cookie kind of a person this is a fun way to get into the mood to make treats. 
You need good quality 2 slabs white chocolate
6 candy canes
1/2 teaspoon of peppermint extract  
Take the plastic wrap off of the candy cane and place it in a brown bag. Using a end of a heavy knife smash the candy cane. In a double boiler melt the chocolate. Add half of your candy cane mix and the peppermint essence. Pour the mixture on to a tray line with parchment paper. Sprinkle the peppermint piece on top and let it cool completely. 
If you want the process to move fast place it in the refrigerator. 
Take them out break them into pieces wrap them in bags or store them in a container until you serve them. 
Note. 
When you smash the candy cane take the big pieces to sprinkle and use the powder to mix in. This will make your bark pretty with little bits of candy cane. 
Quote of the day “see with your heart"
Enjoy!

Saturday, December 24, 2011

Holiday Cookies - Walnut thumb prints


This year we have new neighbors so we were excited to share the holiday cheer. Holidays are always FUN to bake with your kids, Little Nicolette is really getting the hang of baking. She is so excited never complains amount of the baking we have been doing lately. 
She enjoys the different cookies we bake every day. She has also gained control over the situation on baking. She is really good on filling the cups for measuring and even making tiny balls out of cookie dough. I wanted to say mixing is her favorite part when it comes to baking. I can see this in my older one as well. 
I am amazed the time he spent in the kitchen being a teenage guy. He does have a sweet tooth but when it comes to baking they both have their talents. This was my first time making the thumb print cookies I had so much fun just as the kids. What I will do next time is double the batches and buy a lot of bulk baking chocolate. 
Here is the recipe it is so much fun to make these cookies I am considering making another batch. We have run out of cookies this year. Well, you learn from your mistakes.  I was eager to get them out of the house before its get all gulped down by members of our family. 
What you need
1/2 cup (1 stick) unsalted butter, softened
1/2 cup plus 2 tablespoons sugar
1 large egg, separated, each part lightly beaten
1 teaspoon pure vanilla extract
1 1/4 cups all-purpose flour
1/8 teaspoon coarse salt
1/2 cup toasted walnuts ground
apricot jam, for filling
How it goes
Preheat oven to 325 degrees. Put butter and 1/2 cup sugar in the bowl of an electric mixer fitted with the paddle attachment; mix on medium speed until pale and fluffy, about 3 minutes. Add egg yolk and vanilla, and mix well. Reduce speed to low. Add flour and salt, and mix until just combined. Refrigerate dough for 2 hours.
Stir together toasted walnuts and remaining 2 tablespoons sugar in a small bowl. Roll dough into 1-inch balls; dip balls in egg white, then in walnut-sugar mixture. Space 1 inch apart on baking sheets lined with parchment paper. Press down center of each ball with your thumb. Bake for 10 minutes. Remove from oven; press down centers again with the end of a wooden spoon. Return to oven. Bake cookies until golden brown, 8 to 10 minutes more. Let cool slightly on sheets on wire racks. Fill each center with jam.
Quote of the day “train wholeheartedly”
Enjoy!

Friday, December 23, 2011

Coming together...

Remember the dish towel I made and the ornament that was made by kids. Finally I put them together. Now it looks like this. 
I had fun creating these with kids. I personally think creating memories are very important with your children. I remember to this day the holidays in Sri Lanka growing up. Friends and family gathered and we shared food and treats it was FUN I loved the company of my cousins and the presents of my only grandmother in the house because it brings special memories to me. 
Now that we have made our home miles away from our Sri Lanka. It is still equally important to celebrate the season of giving with your children. 
The cookies, conversations, music, mixing ingredients, watching it change, making something edible,and most of all SHARING the final product is really self satisfying in MANY ways. Doing these tasks with our children, lets us indirectly teach our kids the  traditions of holidays. 
Quote of the day “ open doors for others”
Enjoy!


Thursday, December 22, 2011

Anti - Fleece on SALE!


After the big SALE the remnant rack was full of anti-fleece. I was able to get couple since I had planned many projects to use them. The BEST DEAL is when the fabric is on SALE the remnant get another 50% off of the SALE price that is called double dipping. 
I have used anti-fleece sparingly in our house. During COLD nights it really adds a warmth to your bed. After so much studying of the environmental science I needed a break. Well i took sustainability to a whole new LEVAL. 
I LOVE pillows, and love covers I think it is an easy fix to a boring room and a bed. My body pillow needed a cover we ran out of covers can you believe so instead of ordering more I decided to make one with a comfort fabric. 
This is what I did with the remnant fabric I got from the fabric store. LOVELY and COMFY at the same time. I try to get to bed early, no kidding with finals just around the corner. 
Quote of the day “ tap your own maple trees and make your own syrup”
Enjoy!


Tuesday, December 20, 2011

Fudge for Holidays...

How is your baking take place this holidays. We decided to bake cookies. This is fun but a lot of WORK. 


I reconsider my GIFTS next year. When you have a toddler and cookies, and candy at home not a GREAT combination because day STARTS with cookies and ENDS with cookies. 
I cannot wait to get them out of the HOUSE. The nice thing about the holidays is it is the season to celebrate. 


I enjoy every bit of it with my children. So let me start off with our favorite of the season, Chocolate peppermint fudge. This is so easy to make and taste great. You need to give this a try.
What you need to make this is 

Vegetable oil, cooking spray
2 cups sugar
1 teaspoon salt
6 tablespoons unsalted butter
1 cup heavy cream
3 1/2 cups mini marshmallows
3 cups semisweet or white chocolate chips
1 teaspoon pure vanilla extract
1/2 cup crushed peppermint candy
Directions
Line a 9-by-13-inch baking pan with two sheets of waxed or parchment paper in a crisscross manner (one lengthwise, one crosswise) so ends overhang sides of pan; coat evenly with cooking spray.
In a heavy-bottomed saucepan over medium heat, cook sugar, salt, butter, cream, and marshmallows, stirring, until butter and marshmallows are almost melted, 5 to 6 minutes.
Bring mixture to a boil; cook, stirring occasionally, 5 minutes. Remove from heat. Add chips and vanilla; stir until chips are melted. Pour mixture into lined pan.
Let fudge cool in the pan at room temperature, 3 hours. Use edges of paper to lift out fudge; place on cutting board, and remove paper. Cut out shapes with cookie cutters, or cut fudge into bars. Sprinkle evenly with crushed candy.


Quote of the Day "Be a good cheer"


Enjoy!

Christmas ornaments made at home...

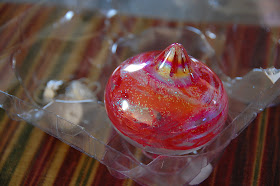
 We created our christmas ornaments at home and it was fun. used up some old clear ornaments with glitter glue and of course some christmas colors. This was a fun project to do with your toddler but guess who really enjoyed making the ornaments was my teenager.

It was a fun afternoon he was thrilled to do this activity with his sister. He is a wonderful brother who adores his sister.

How it is done. You need clear glass ornaments, get them from your local craft shop. Use clear glue with glitter. Squeeze some into the ornament and use a paint brush to paint it around the ball. Let it dry for a while. Good time to listen to some holiday music.

Once dry with the clear glitter coat. Now let your toddler pick the holiday color and squeeze it into the ball and proceed with the brush and watch the strokes. ( I used red and green)

Let them dry, inserts tops they are ready add color to a simple homemade gift check out the next post...

Quote of the day “tell someone you can not wait to experience whatever it is they are working on”

Enjoy

Sunday, December 18, 2011

Holiday Gifts Made at Home

I cannot take full credit for this project because I have seen this project in many magazines and blogs. I wanted to create these wonderful dish cloths/mats as holiday gifts. I do not own a dishwasher in my current house. Practically I am the dishwasher. I am not so much use to the dishwasher anyways. Those who are new to my blog, I grew up in Sri Lanka without dishwashers but with a washing machine thanks to our dad who worked overseas.

The goal of this dish mat is to place your glass/cups on the mat when emptying your dishwasher, after draining them on the dish rack you can place them on the dish cloth/mat. Few more uses I have seen in other blogs place your drinking glasses, cups, during day it will cut down you’re washing cycles after every use, and simply if you are like me washing your dishes by hand you can place them on your dish cloth/mat.

This is a very simple project and you can use the materials you have in your home like an old terrycloth towel, leftover fabric from another project. This is a fun project to do but a useful gift during holidays to offer to your neighbors or friends may be with some homemade soap. That’s in my to-do list as well.

Perhaps you can ask the receiver to invent some creative ideas use up your dishcloth and give you the feedback.

Here is what you need
5/8 yard of Printed fabric of your choice
5/8 yard of coordinating fabric
5/8 yard of terrycloth
Sewing Machine
Creative Time

Cut them into strips I did one broader and the other thinner and laid thin in between the broader. Repeat the pattern sew them and top it off with the top stitch. Place the mat right sides together the terry cloth right side and the placemat sew it around leaving a small opening to turn it inside out/ So you can bring the right sides out. Fold the opening and go around the edge with the top stitch.

You are done with the project.

Quote of the Day “ engage in activities that gives you joy”

Enjoy!

Thursday, December 15, 2011

Sandwiches 101...

We use leftover food to make sandwiches. This is the season to be creative with food. I literally can make sandwiches from anything as long as I have grated cheese because it is my binder/glue.
We had steak, mashed potato, and sautéed Chinese vegetables for dinner. Now how do I make a sandwich out of these next morning for breakfast; pretty easy. I did fried an egg a good source of protein. While I was making it I did cut my mashed potato and slightly browned it. 
I also cut my steak into very thin slices pan fried it just as the mashed potato. I loved whole grain bread and we love that in our lunchbox as well. 
Now is the fun part stacking add a little bit of grated cheese, mashed potato, few slices of steak, fried egg, mashed potato, sautéed chinese vegetables, and finally top it off with grated cheese. Place the other slice of wheat bread on top of it and place the double decker on a panini press and press.
You end up with something like this... Fun way to finish all the leftover food. 
Quote of the day “tame your appetite”
Enjoy!

Wednesday, December 7, 2011

My Antique Finds…


On my routine visit from the fabric store I stopped at an antique store. I am hunting for old mason jars. I did found some but I was not ready to offer $4.50 for a one jar. I will continue my search. Now that being said; something else caught my eye at this store. It was a copper bowl and guesses what? It was made in the USA. I was thrilled it was made in the USA and it was made out of copper. The beauty of this piece was its shape. It had a shape of a dogwood flower. I happen to love dogwood which I do not own in my yard.

Well since it is made with copper I decided to use a little bit of brass polish and polish this little bowl. I have not decided yet what I am going to do with this. I would love to simply display it during summer when all the dogwoods trees are in full bloom may be before that.

I paid $ 5.00 for this bowl which I think not too bad. So that was my find for the month of November I know I am little behind blogging about it.

Quote of the day “watch flowers slowly open its petals”

Enjoy!

Monday, November 28, 2011

Key Lime Custard Tart…


How was your Thanksgiving? I felt it was too fast all the buildup and then it was here and now gone. I was overwhelmed with the amount of work I had from school and the commitment to make a big thanksgiving lunch. Yes, we are big on Thanksgiving lunch partially because Panduka work to retail and he needs to get to work so lunch work great for us. This year I baked a turkey. I know I did not post any meal plans beforehand. I did the things as I went along the planning well that’s me.

However I was very good at panning the desserts for Thanks giving because it was my favorite part of the whole meal. Here it is how it goes…

Pumpkin Pie
Key Lime Custard Tart
&
Two Layer Pumpkin Cake with Cream Cheese Frosting

Here is my recipe for the Key Lime Custard Tart; my son was practically the guardian angel of this tart. He said he LOVED it and I believe him because did not get to try it.

Crust
¾ cup (1 ½ sticks) unsalted butter cut into small cubes
1/3 cup confectioner’s sugar
1 teaspoon freshly grated lime zest
¼ teaspoon sea salt
1 ½ cups all purpose flour plus extra for dusting

Custard Filling
6 large eggs
1/3 cup heavy (whipping cream)
1 cup granulated sugar
2 teaspoon freshly grated lime zest
2/3 cup fresh lime juice

1-2 limes cut into paper thin rounds for decoration
confectioner’s sugar for dusting

To make the crust I used the food processor, first add all your dry ingredients and lime zest pulse it few times. Add the cubed butter and pulse it until it is coarse grain. Do not over pulse it key to perfect dough scrape it out make it into a disc and refrigerate it for at least 30 minutes.

Transfer the dough into lightly floured surface dust the top of the dough and the rolling pin and roll it into a 12-inch round about 1/8 thick. Transfer the dough into a 10-inch fluted tart pan key here is roll it on to your rolling pin this will make the transfer much easier. Line the dough with foil and place pie weights and bake it for 20 minutes 350 F. Carefully remove the foil and bake it for another 5 minutes until the crust is dry not moist. Reduce the temperature to 300F.

To make the filling, in a large bowl whisk the eggs add cream, granulated sugar, lime zest, and lime juice. Whisk until well combined. Carefully fill the tart shell. Bake the tart for about 30 minutes. Turn the oven off and without opening the door; leave the tart undisturbed for 30 minutes longer. Refrigerate until well chilled, for at least 2 hours. Before serving arrange the lime slices around the tart edge and dust the top of the tart with confectioner’s sugar. Slice it into wedges and serve.

Quote of the day “Stop an argument in your mind before opening your mouth”

Enjoy!


Friday, November 25, 2011

I am Thankful…

I am thankful for my healthy children and husband
I am thankful for the fall weather
I am thankful I can rake the leaves and make a colorful pile
I am thankful I can find new in old
I am thankful I can enjoy every bit of FALL…

Happy Thanksgiving to you and your family…

Enjoy!

Tuesday, November 22, 2011

Pillow Cases with fun Fabric…

This is a very soft, fun, and a unique fabric. I was eyeing this for couple of months and wanted to get hold of it and I finally did. I made these pillow covers to Nicolette’s pillow cover collection we have been working.

Nicolette loves her plush toys comparing to her brother. She actually holds them, walk around with them, and sometimes forget them.

I knew she is going to LOVE her pillow covers because this fabric mimics her plush toys. Apparently she did. This could be a lovely B’day gift to an older kid/toddler with a plush toy perhaps with a book would be ideal to make the bedtime tale sounds FUNNY, COZY, and SNUGGLY.

Quote of the Day “console a crying baby”

Enjoy!


Thursday, November 17, 2011

Dear Bloggers I am very Thankful to all of you…


I was so happy and thrilled to read all your comments. I am in the process of visiting all of your wonderful blogs. I am even so grateful some of you chose to follow my blog this means a lot to me. I have to admit SITS DAY was a wonderful day to celebrate a blog author and I am very thankful to all the SITS STAFF for doing fantastic and a superb job!
As some of you who knows me I am in school the finals are around the corner and the papers are due on due dates.

Fall is closing in I have to soon stop working in the yard. This is going to be hard for me. I have been to nurseries to find deals some of them are so great I cannot make up mind. Keeping a tight tab on the weather so I won’t miss a warm day to plant the final bulbs and the knock out roses I bought. Most of them were 50% to 75% off. I needed color in between my evergreen trees.

Well finally I am done working in our yard sometimes I am afraid to say this because I know me which is scary. I am ready to take rest and enjoy winter see the changes… get in tune with nature.

Little Nicolette has been a great helper stacking up the empty pots, digging, mulching, and planting bulbs. I am sure she will be very excited to see her hard work with spring blossoms.
My point is with all these I still wanted to thank you all for your encouraging comments. I LOVED it very much… So I will be visiting you all… Thank you again for all the support and the encouragement you all offered me yesterday!

Quote of the Day “Choose one fun thing to looforward each day"

Enjoy!